Learn To Change Facebook Fan Page Name After 200+ Likes
Share the post "Learn To Change Facebook Fan Page Name After 200+ Likes"
 Facebook
is one of the most widely used social media marketing platform with
over 890 million daily active users on an average for the year ending
Dec 2014. This number is expected to grow at 5%-6% in 2015. With this
kind of soaring numbers and growth, Facebook has become the most
important social media platform to be on, be it an individual or a
company. Facebook fan pages are pretty important for organizations to
connect with their user-base and followers. Now creating a Facebook page
is simple but actual problem arises after getting more than 200 likes
as Facebook due to some reasons does not allow you to change the fan
page name. Below are few tips that can help you to tackle this problem.
These tips will enable you to change the name of fan page several times
even after getting more than 200 likes.
Facebook
is one of the most widely used social media marketing platform with
over 890 million daily active users on an average for the year ending
Dec 2014. This number is expected to grow at 5%-6% in 2015. With this
kind of soaring numbers and growth, Facebook has become the most
important social media platform to be on, be it an individual or a
company. Facebook fan pages are pretty important for organizations to
connect with their user-base and followers. Now creating a Facebook page
is simple but actual problem arises after getting more than 200 likes
as Facebook due to some reasons does not allow you to change the fan
page name. Below are few tips that can help you to tackle this problem.
These tips will enable you to change the name of fan page several times
even after getting more than 200 likes.
No matter what business you are in, this
trick can be applied for all sort of pages for e.g. personal profile,
business page, page of any institution etc.
Make sure to follow the below mentioned
steps in the same order or else it will not work and it might negatively
impact your Facebook fan Page.
Approach 1
- The first step is to operate your Google Chrome browser. Once you open your browser start by searching and installing Zen Mate extension in Google Chrome.
- Next step to type in your mail id and generating a password.
- Next step involves restarting your Google Chrome browser.
- Once you have restarted your browser the next step is to change your location to the USA location in ZenMate.
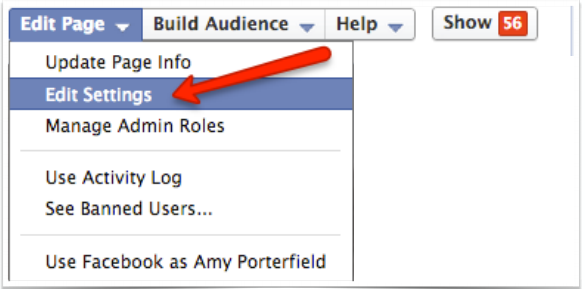
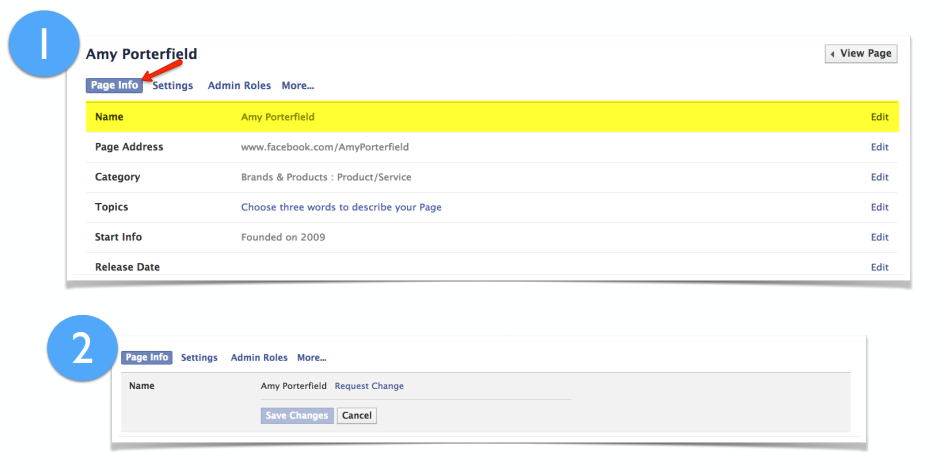
- Next step involves logging in your Facebook account and going to the Desire page. Once on the desire page click on the update info option and then click on the edit or change name option.
- Once you are through with this, you will see a Request Change option appear before, you need to click on this option.
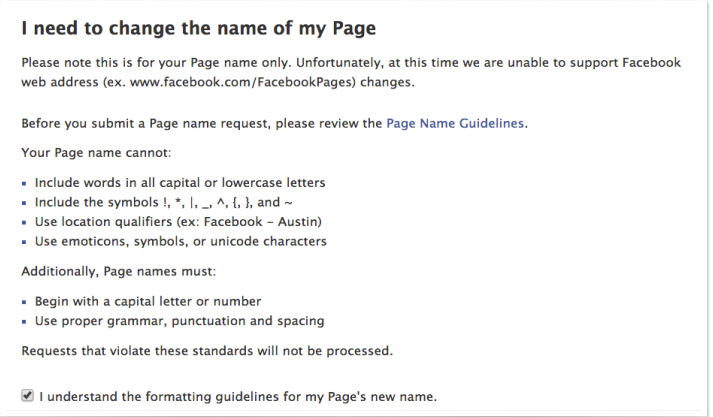
- You will see a new window opening automatically on your screen (I Need To Change the name of My Page.)
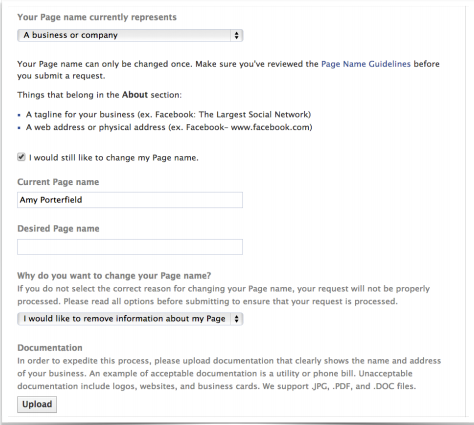
- You can choose any of these options or you requirement.
- Next step is filling up of the old page name and providing a new name.
- Next you need to input provide your identity proof. You can provide any of the IDs issued by the government.
- This is the end of the process. You will get a reply from the Facebook team for name changed.
Approach 2
1. Setting up a proxy on Google chrome
 One
of the useful recommendations is to use a Japan proxy “112.175.251.56”.
There is a reason for doing so, when we try to connect with proxy,
chances are that your internet connection sometimes becomes pretty slow,
which defeats the main purpose and it becomes difficult to remain
connected. Japan proxy is one of the fastest proxy. because when
connected with proxy your internet connection might become slower.
Following are the steps that needs to be followed for setting up a
proxy in Chrome:
One
of the useful recommendations is to use a Japan proxy “112.175.251.56”.
There is a reason for doing so, when we try to connect with proxy,
chances are that your internet connection sometimes becomes pretty slow,
which defeats the main purpose and it becomes difficult to remain
connected. Japan proxy is one of the fastest proxy. because when
connected with proxy your internet connection might become slower.
Following are the steps that needs to be followed for setting up a
proxy in Chrome:
- Start by opening up Google Chrome and clicking on the settings tab. Type “proxy” on the search bar. You can also paste the following phrase on the address bar of Chrome “chrome://settings/search#proxy”.
- Click on the tab “Change proxy settings” this will lead to a popup called “LAN Settings“ click on this option to enter it.
- Next step is to click on “Use a proxy settings for LAN”. Use this along-with the IP “112.175.251.56” and port “8080“.
2. Opening the Facebook page and updating info
Once you are through with creating a proxy, the second step is to open the Facebook fan page whose name is to be changed.
- Now in the edit page click on the option “page info”.
- In both the fields choose the category option and change it to “Local Business”.
- Also make sure to remove any other existing address that may be present, from the “Address” option. Proceed by saving this.
3. Translating name for the Facebook page
This step involves changing the name of
your Facebook page. For doing so, you need to press on the “Translated
Name” tab which further displays 4 languages to choose from. You need to
choose any one of the languages and type in a new name for your page,
next to this language’s text box along-with the language’s symbol at the
end (as displayed below).
- In case of Japanese language add the ッ symbol.
- For Chinese language the symbol is 人.
- Similarly for Korean symbol is ㅿ.
- And for Arabic language you need to add the symbol ـا
For instance if I’m changing my page’s translated name in korean language then i will input it as “Tech fishy ㅿ“.
4. Changing the language into the desired one
You need to scroll right to the end of the Facebook page where you will find English (US). You have to change this into the language in which you have inputted the translated name above.
For e.g. If I have used
Chinese language, so I will select and click on the language tab and
select Chinese. Suppose you cannot find this language in the pop-up
window then just move the mouse on the languages section, you will see
the tittle appearing.
5. Changing the address of your page
Once you change the language, you might
see that all texts that appear on the screen are in the same chosen
language. So, the next step involves changing the address your Facebook
page.
For changing the address, you need to select the “Edit Info” tab in the page and then click on the 5th option appearing from the top. This is just the address name changing option’s translation in the selected language.
If you have chosen Japanese or Korean or Chinese:
- In the first box write in the number “0or 0000″.
- In the 2nd box, Putin the text “Amman,Jordan” .
- Input the word “Jordan” in the 3rd box.
Suppose end up using Arabic as the language of your choice:
- For the 1st box input the word “Jordan“.
- Putin “Amman, Jordan” in the Second box .
- Input “00000” in the 3rd box.
Now you can save the address as well as the map.
Lastly, change back the Language of your
page to English(US) and now you will see that your page’s name gets
changed along-with the text entered by you and also with the symbol at
the end.
6. Removing of the symbol that appears after the Page Name.
This is optional, suppose you do not want the symbol and want it to get removed, then follow the below steps.
- Remove the address that was entered earlier from the Address category option and make it empty.
- Now you need to remove map from the Address category option and select the “Turn Off“ tab.
- Press on the “Translated Name” tab and this will display the “English” language option.
- Next step involves removing the symbol from that text filed. Once this is done click on save.
- Lastly,change the address that is currently appearing as “Detriot”, City/Place to “Detriot,Detriot” and save it.
This will change your Facebook’s Fanpage name, which will now appear without any symbol at the end.